The Story
I built my first hackintosh in 2012 which was my "Apple Cube 2.0" with a Core i5 2500T. It runs good but was not powerful enough so I decided to built another one in 2013 (Apple Cube 2.1) with a Core i7-3770T which runs great so far. Both Cubes are great but they are not the first choice for picture or video editing with 100% CPU load for a few hours. That's why I needed another Mac with great performance which stays cool under full load.
Hardware Build
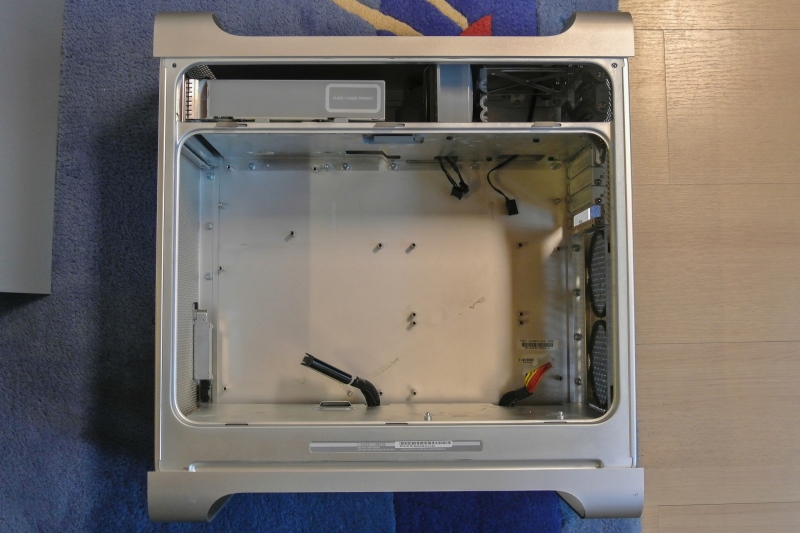
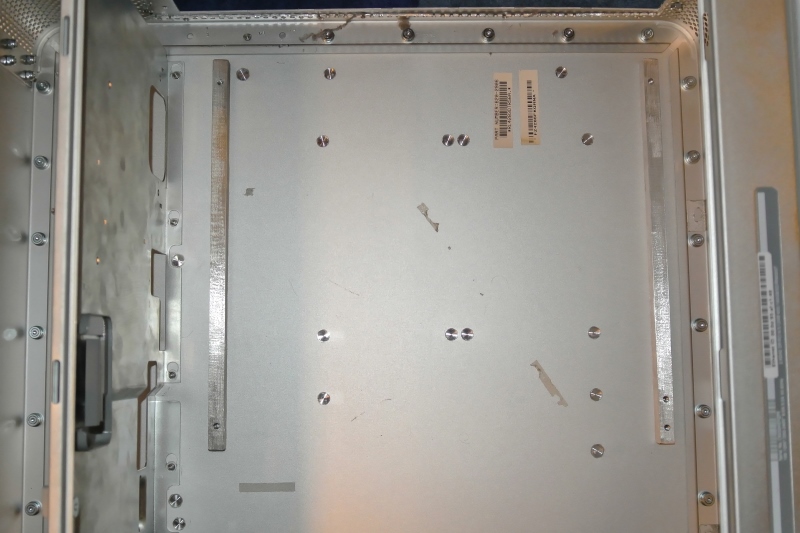
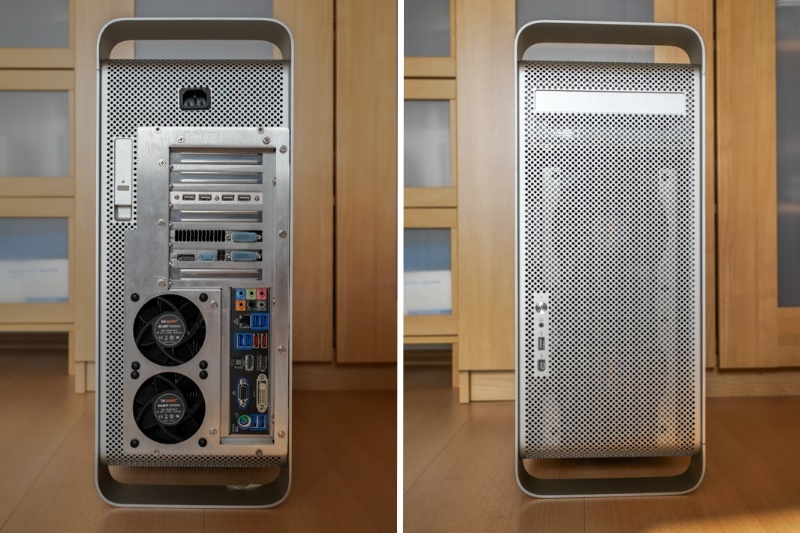
A hackintosh is a "real" hackintosh for me when you can't see that it is one . So I took an "Apple PowerMac G5" case for that build. I found one on eBay without the hardware. It has only the power supply, fans and optical drive in it.
I decided to remove the original power supply and install a regular ATX PSU in the upper part of the case. This results in enough space for an ATX mainboard which can be installed in the lower part. I removed all holders from the case to be able to install the new board. But how?
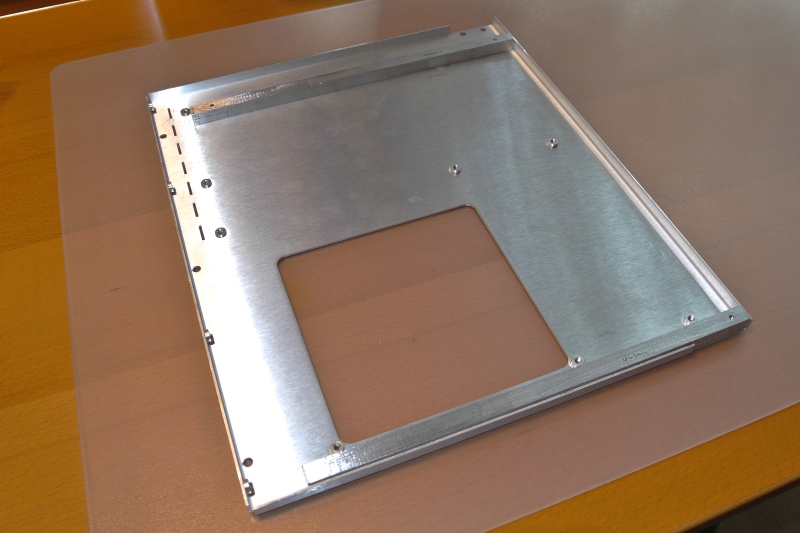
The "Modular Removable Motherboard Tray" from Mountain Mods looks like the best solution for that. I bought it in the US and it was shipped the long way to Germany. Two aluminum rods with screw threads shall hold the tray in its position. I used my Dremel 300 for cutting the hole in the backside of the PowerMac G5 case. It is an excellent tool for that work. The whole case was protected with masking tape to prevent scratch.
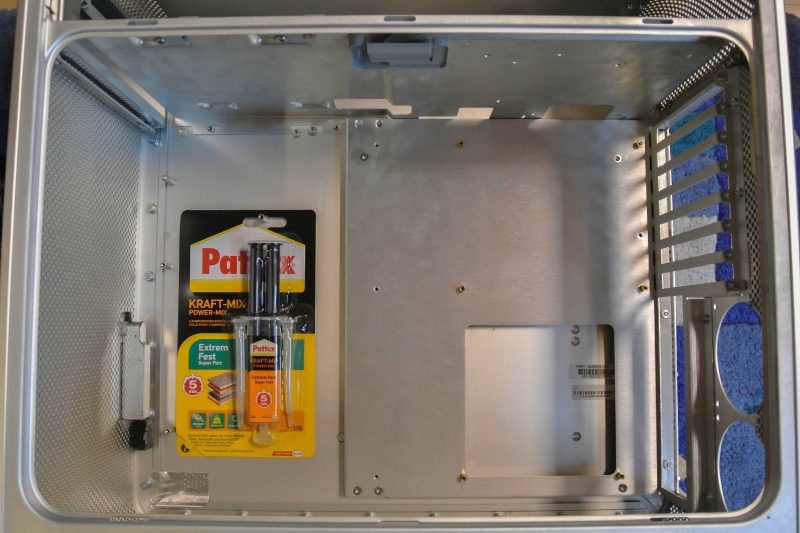
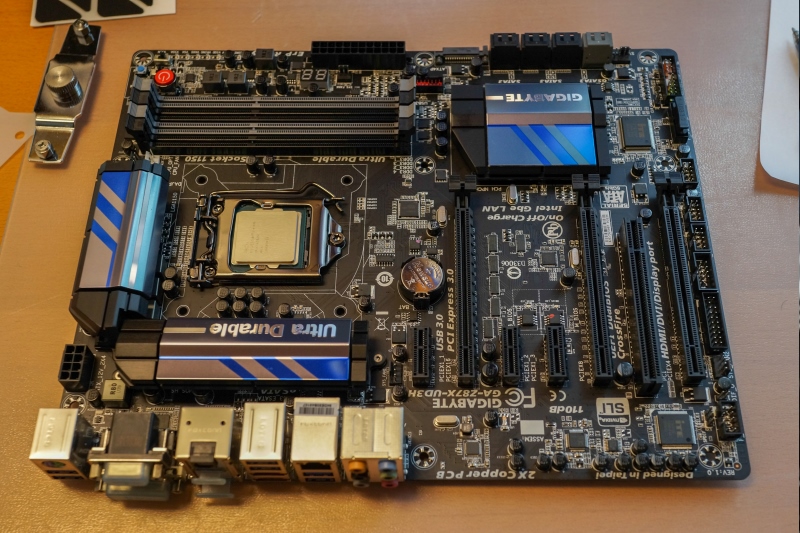
The "Pattex Power Mix" two component epoxy adhesive is great for gluing the aluminum rods into the case. As you can see the "Modular Removable Motherboard Tray" fits perfectly in the case and there is enough space for a large "Gigabyte GA-Z87X-UD3H" ATX mainbord.
The "Enermax Platimax 600W" is mounted 'inside' the case so I needed a short extension cable from the power supply to the case in order to plug in the power cable. I cutted a hole in the metal plate of the case in order to provide ventilation for the Platimax power supply. The PSU fits perfectly in this position. I used the screws of the fan mesh to fit it in the case.
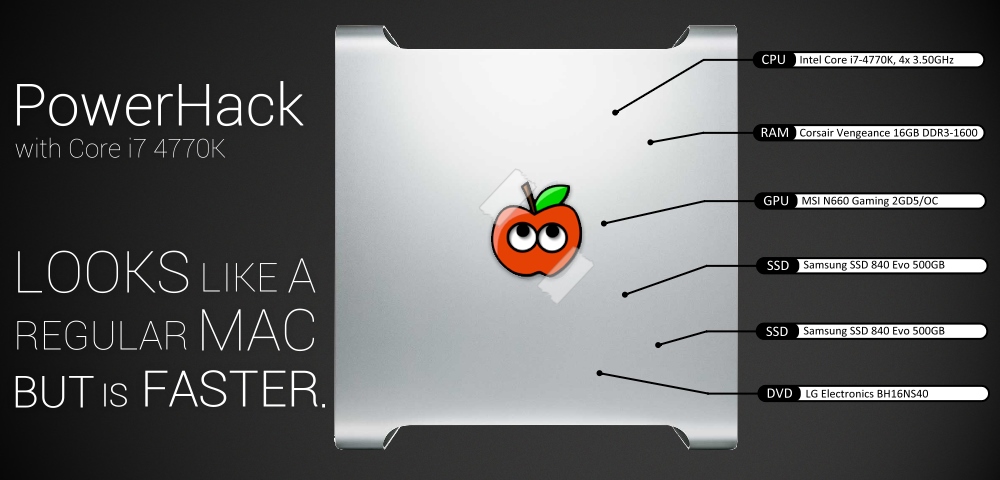
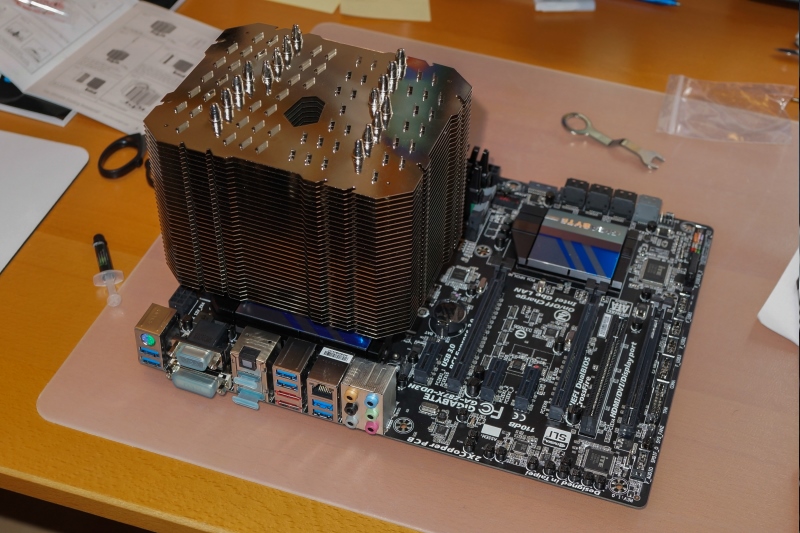
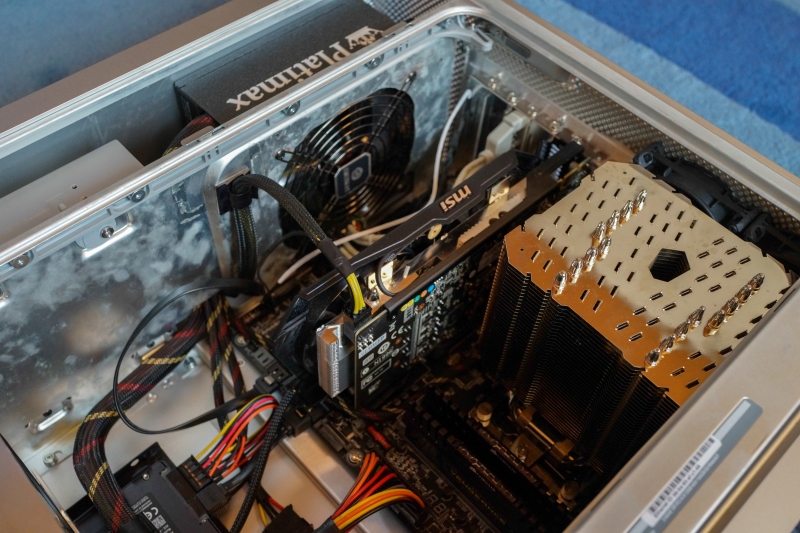
The "Gigabyte GA-Z87X-UD3H" board is equipped with a ALC898 onboard sound and an Intel i217V LAN card which should work out of the box. I installed the Intel Core i7-4770K and the huge semi passive Thermalright HR-22 CPU cooler.
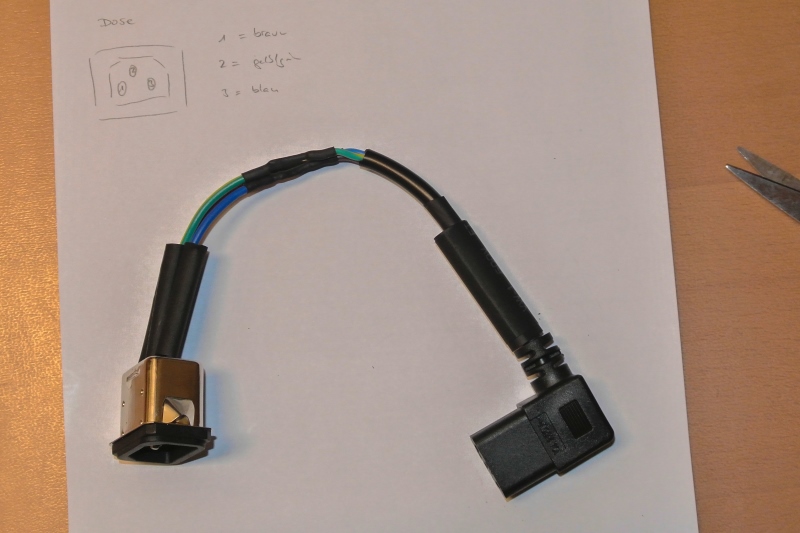
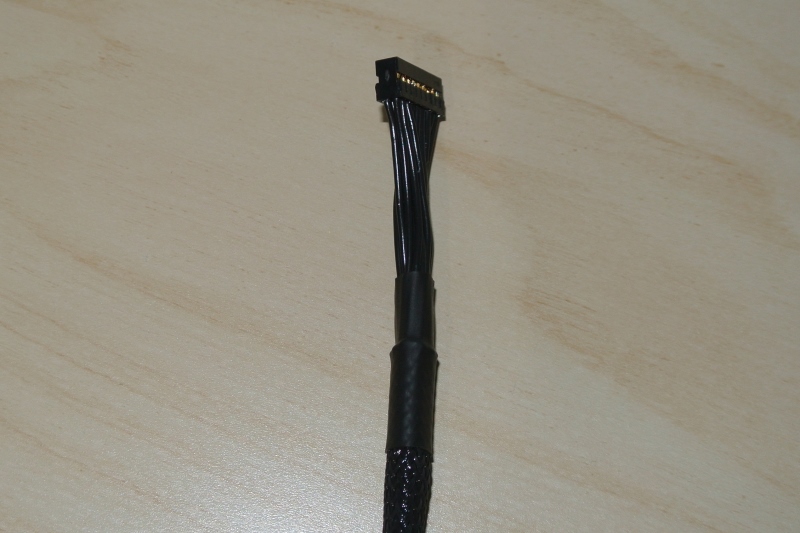
My "Apple PowerMac G5" case comes without a front panel cable. So I have to build my own one. I ordered all required parts on Mouser to be able to use the sound, USB, power LED and switch of the front panel. The board has no firewire connection but I build it anyway.
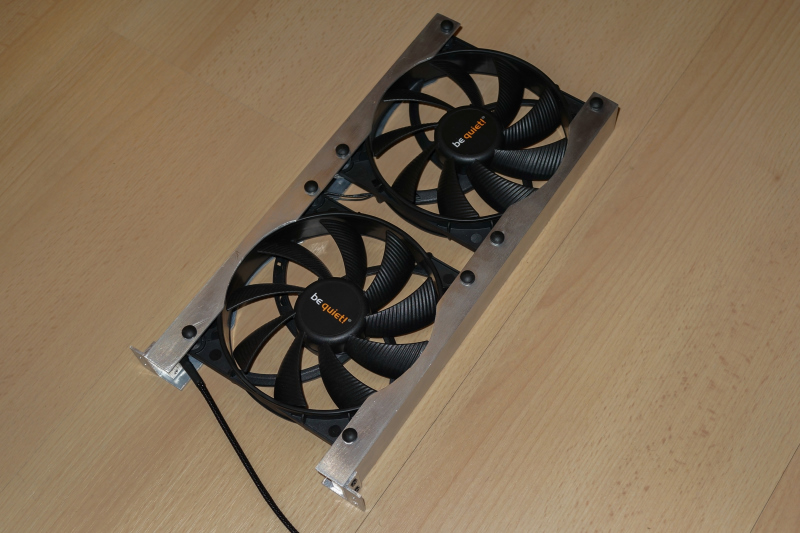
I like those huge 140mm fans from be quiet! so I used two "Silent Wings 2" for case ventilation. Both fans are running at 7V with around 650rpm which are nearly noiseless at this speed. I used an aluminum frame for both fans and connected the cables together.
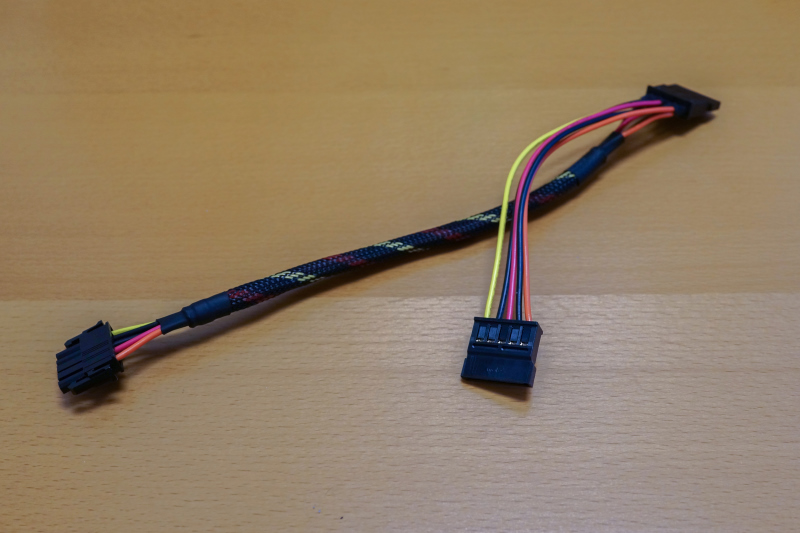
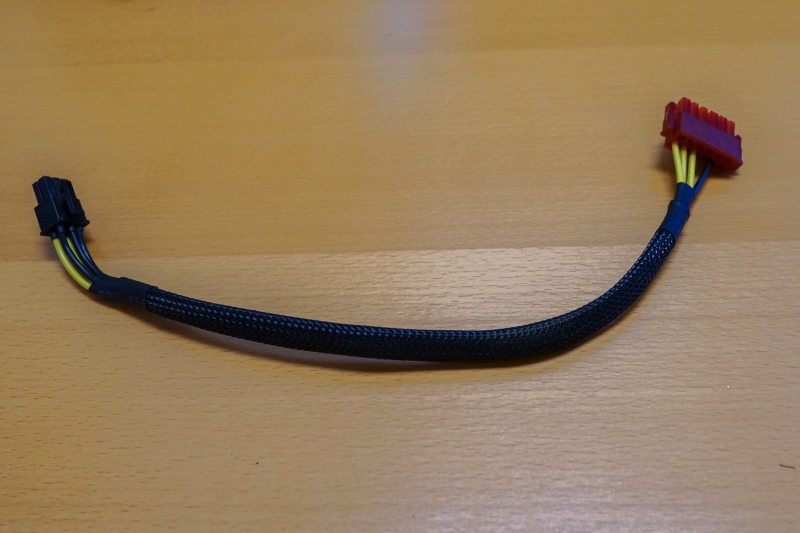
The "Enermax Platimax 600W" is a modular PSU which allows to use only the required cables in the exact length. I made my own SATA cable for both "Samsung SSD 840 Evo" SSDs. One drive shall be used for Mac OS X Mavericks and the other for Windows 7. I selected the GeForce GTX 660 "MSI N660 Gaming 2GD5/OC" because it has a DisplayPort and a good price/performance ratio. It is not the latest version but should work great under Mavericks. It has only a 6-pin VGA connector which I also made in the exact required length.
All parts are ready and can be assembled in my "PowerHack". I used a frame from Digitus to install both SSDs in the case. The frame is also machined with the Dremel to provide more stability to the alu frame for the fans. I used the original screws in both cases to fix the parts in the case. The two small "be quiet! Silent Wings 2" 80mm fans shall blow the heat of the Thermalright HR-22 cooler outside. Both fans are running at 7V with around 1150rpm and are also nearly noiseless but provide enough air flow. The GeForce GTX 660 is installed in the first PCIe slot and connected to the power supply. I installed an additional slot bracket with 4 USB2.0 ports because the board only provides USB3.0 ports.
And there it is. My brand new PowerHack with Core i7 4770K:
BIOS Settings
Performance: Frequency
- Extreme Memory Profile (X.M.P): Profil1
BIOS Features
- Vd-T: disabled
- Intel Virtualisation: enabled
Periphals: SATA Config
- SATA Mode Selection: AHCI
Periphals: Device Config
- Init Display First: PCIe Slot 1
- Internal Graphics: disabled
- XHCI Hand-off: enabled
- EHCI Hand-off: enabled
Power Management
- High Precision Event Timer: enabled
10.9.2 Installation
Preparation
- Generate a "USB" stick with UniBeast and your purchased 10.8.3
Installation
- Boot with USB Stick
- You do not need to type in GraphicsEnabler=No or "-x"
- Perform installation
- Boot into Mavericks without arguments
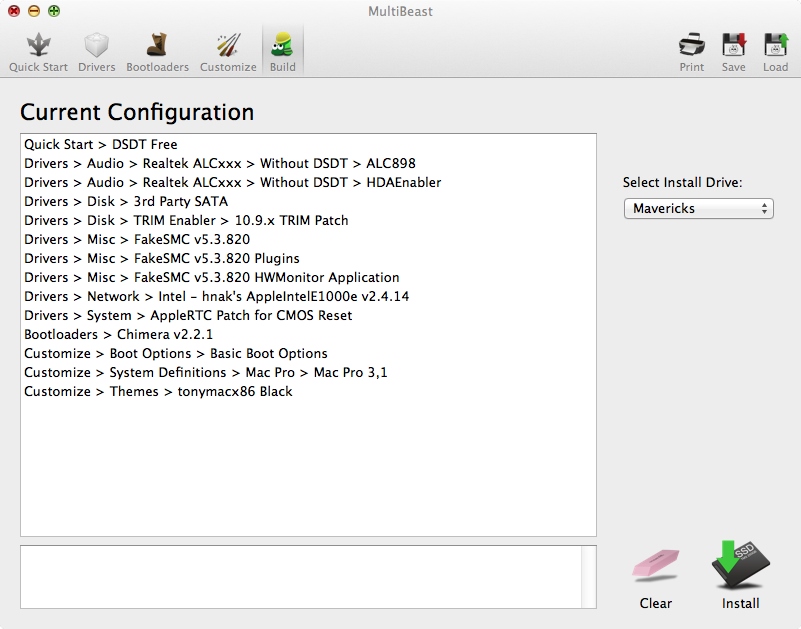
- Run MultiBeast (6.1.0) with the following settings:
- Restart
For more details about my "Apple PowerHack" visit the tonymacx86 forum: